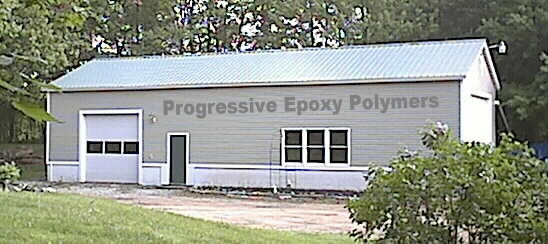
PROGRESSIVE EPOXY
POLYMERS, INC.
Pittsfield NH 03263
Quick
EMAIL / ph 603.435.7199 EST /
Google
SITE SEARCH
/ Buy On-line
TWO
STORES / Web Product
CATALOGS

CATALOG/BUY/1PAGE$$
NO SALES TAX - You
are shopping in TAX FREE New Hampshire
**
Quick
EMAIL
/ ph 603.435.7199 EST / Google
SITE SEARCH
/ Buy On-line
TWO
STORES / Goto Contact
PAGE / Web Product
CATALOG /
Progressive Epoxy
HOMEPAGE / View
our VIDEO / Navigation Bar
REPLACEMENT / Data
and MSDS
PRODUCT INFO
/ Epoxy Guru
HELP SITE / Top Selling
Products -
FAVORITES
* *
We are the only
technology based coating/epoxy/resin company that actively encourages your phone
calls, not just during our East Coast work hours but also after/before hours,
evening, weekends and even holidays. We're available when you are. We form a
personal relationship with our customers and freely share technical information,
how to-advice, product information and tips-and-tricks. Speak with a
non-salesman technical professional with over 25 years of experience in the
resin/coating/epoxy industry (no newbie staffer on the phone lines!). Floors,
tables, boats, leaks, rot repair. We handle it all!
We are an 'always available,'
one-on-one, technical/scientific, coating company (watch
our video).
We are NOT one of those fluffy/slick mass sales firms the dominate the internet
selling cheap third party (made in China???), low end epoxies and coatings with
no real knowledge of what they are selling and quotas to sell to as many people
as possible. 603-435-7199 (east coast time).
BEST DIY SEAMLESS EPOXY
RESIN
QUARTZ FLOORS -
APPLICATION MANUAL
resin/quartz broadcast floors
Quartz - sand
broadcast floors - tough and non skid
Your Host and Tour Guide:
Paul Oman, MS, MBA -
Progressive Epoxy
Polymers, Inc.
(floor epoxies,
marine epoxies, underwater epoxies, repair epoxies)
Member: NACE (National Assoc. of
Corrosion Engineers), SSPC (Soc. of Protective Coatings)
Board member:
Friends of the Suncook River
- 501(c)(3) non profit ----- Founder: Friday
Night Paddlers .
"Professionals helping Professionals"
FLOOR
EPOXY SYSTEMS SINCE 1994
"You provide outstanding products, and Fantastic
Support. Thank You."
Brian S.
(call 603 435 7199 anytime)
"Thanks for all your advice, tips & moral support
concerning my project. It turned out beautiful. Quality people backing a quality product is the
only way to go!"
Joe
Seamless Epoxy Quartz Floors Are the High-End, Toughest and
Most Durable of All Floors. They Can Be Made to Look More Attractive By Using Colored Sands and A Clear Topcoat
Instead of Aluminum Oxide Or Regular Sands For Serious Commercial Applications, This Is The Primary Epoxy Floor
System To Consider.
Epoxy Floor Section in our online catalog - CLICK HERE
No Sales Tax applied. Save Money.
You're shopping
in Tax Free New Hampshire - and you can order bulk order our Industrial Floor
Epoxy in any gallon amount over 15 gallons packed in five gallon
pails (besides our standard 1.5 gal units packed in DIY cans)
Highest Quality Commercial Epoxy
Resin Floor
After suitable surface preparation, we generally recommend a coat of gray industrial floor epoxy covered to excess
with aluminum oxide (sands works too, but not nearly as durable). Any excess aluminum oxide is then swept away
and the surface covered with another coat of industrial floor epoxy. This locks the aluminum oxide in place and
essentially results in a quartz (or aluminum oxide) floor held in place top and bottom by epoxy. Expect the epoxy
to yellow in direct sunlight.
Colored Sand Broadcast System
This system repeats the Highest Quality Commercial Floor System described above, but replaces the sand or aluminum
oxide layer with a layer of blended color quartz sands (practically an infinite combinations of number of different
colored sands and proportions of each color. Background epoxy color also affects final color appearance). After
the excess sands are swept away the remaining surface is covered with a clear top coat (epoxy, linear polyurethane,
or acrylic - see
Clear Coat Page).
If epoxy is used as the clear sealing topcoat, yellowing will result areas exposed to direct sunlight.
Because of the cost of the sand,
especially the shipping charges, this method is rarely used by homeowners, and most commonly used in commercial
applications.
Order direct from the manufacturer - CLIFFORD W ESTES CO INC. 973-575-4400
- www.estesco.com
Application Manual
User Directions for Applying An Epoxy Floor
Professional contractors apply our
Industrial Floor Epoxy (tm).
Now you can too!
catalog page or
buy now
Disclaimer: The comments below are offered only as suggestions and guidelines. All decisions regarding product
selection, surface preparation, and coating application are the sole responsibility of the purchaser.
Surface Preparation
Surface preparation is, or should be, a significant portion of any epoxy coating project. Each surface and environment
is different and unique. Some surfaces will accept coatings with minimal preparation, others will always exhibit
problems. Experienced coating applicators will often refuse to accept these problem floors.
It is nearly impossible to know ahead of time how much preparation is necessary. A minimalist will simply brush
or sweep the surface, apply the coating and hope for the best. Slightly above this step is to ‘acid etch' the concrete with acid
purchased at the hardware store. On the other extreme, some people will wash, degrease, chemically and/or mechanically
etch the surface and then sometimes repeat the process. Some place between these, just sweeping and repeated processing
is probably the wisest approach and the one commercial contractors follow. Home owners, lacking the tools for industrial
mechanical surface preparation, often just sweep, hose or acid etch.
The problem with surface preparation is that it is often several months down the road before coating failures related
to surface preparation may appear. By then it is too late to do much except laboriously remove all the recently
applied coating and begin all over again. That said, for homeowners, the minimal approaches usually prove adequate.
VISIT OUR
CEMENT FLOOR
EPOXY SURFACE PREPARATION SITE
Surface Problems
Grease and oils can create serious adhesion problems for coatings. Degreasing and washing may appear to remove
the grease or oil, but in badly saturated situations residual oils/greases seem to remain and may cause a coating
failure in the future. While not a definitive test, pouring a glass of water on the concrete and watching what
happens can provide a valuable clue to coating adhesion. If the water quickly and evenly soaks into the concrete
the surface preparation may be adequate at that point.
Moisture either in the concrete, and/or migrating through the concrete can cause coating failure as well. Taping
a sheet of plastic to the floor and looking for moisture to form under the plastic is a crude but common test for
migrating moisture. Some epoxies will handle a wet or damp surface better than others. Note that crystals forming
on the surface due to water migrating through the mineral rich cement can create forces of up to 1,500 pounds of
pressure as they grow in size. Few coatings can withstand such ‘anti-bond' forces.
Irregular surfaces on the floor will show through the epoxy and may be more noticeable after the epoxy is applied.
Fill or patch any irregular surfaces on the floor before starting. You can mix sand into a small amount of epoxy
to form a slurry (the sand will decrease the amount of epoxy needed) to fill voids and cracks. Do not fill in or
paint over expansion joints in the floor. The epoxy will crack, split and lift off when there is movement along
the expansion seam.
If the floor is subject to heating and cooling cycles, air bubbles (that often form tiny craters in the epoxy)
can sometimes be a problem. As the concrete heats up in the sunlight, the air in the void spaces of the concrete
expands and forms a bubble that gets ‘stuck' in the thickening epoxy. If this is a potential scenario for you,
apply the epoxy when the air/concrete is cooling off rather than heating up. When the temperature is falling the
air contracts and will literally pull the epoxy into the concrete void spaces. After the epoxy has cured, the heating
and cooling cycles are not a problem.
How Many People Are Needed
One person can do a small area epoxy floor by himself, but it is much easier with a multi-person team. The best
team size is probably three to five people. That is one or two people rolling on the epoxy non-stop, one or two
people spreading the sand or vinyl chips non-stop, and one person mixing fresh batches of epoxy, refilling sand/chip
supplies, and helping out as needed. Applying the sand or vinyl chips is probably the slowest of the tasks.
Mixing The Epoxy - Epoxy Notes
Initially mix only the amount of epoxy that can be used in 15 minutes or so. I would begin by mixing a batch of
between 24 and 40 ounces of epoxy to begin with. Depending upon the air and surface temperature, the specific epoxy
product, the amount of epoxy mixed, and the size and shape of the container, the working time (pot life) of the
epoxy can vary from about 15 to 50 minutes. It is best to begin by mixing up small batches and increasing batch
size until you determine the amount you can easily work with without going beyond the pot life. Once past the pot
life, the epoxy will begin to thicken/harden and become warm to very hot.
Mixing is often done with a mixing rod sold at hardware stores that attaches to an electric drill. There is no
magic time for how long to mix, you simply have to mix the two parts very well. It is pretty much guess work as
to how much mixing is enough. Common sense is usually all that is needed.
Never attempt to get every last drop of epoxy out of your mixing pot. The few drops of epoxy clinging to the sides
and corners of your mixing container will not be well mixed and may not harden. I like to mix in one container
and work out of a second container which I have filled from the mixing container.
|
WATER BASED (WATERBORNE)
EPOXY FLOOR PAINTS
|
SOLVENT FREE (or low solvent)
EPOXY FLOOR PAINTS |
|
(comparison table)
Water
Bond Epoxy (tm)
med.
gray only |
(comparison table)
Industrial Floor Epoxy (tm)
light
gray or beige only |
|
* actually
contains voc solvents plus water (restricted in some locations)
* slight odor
* very long pot
life
* water clean-up
* large coverage
per gallon
* good color
stability
* very thin
coating - will not hide flaws (may highlight them)
* somewhat
breathable and some penetration into concrete (good adhesion)
* generally less
used than solvent free epoxy floor paints
* can be primer
/sealer under other epoxy (non epoxy) floor systems
|
* no solvents or
VOC issues (solvent free only)
* generally odorless
* wet thickness
equals dry thickness (no shrinking)
* thick coating
hides flaws and imperfections
* can trap air
bubbles from expanding air in concrete
* shows epoxy
yellowing in UV
* coverage about
150 sf per gallon
* creates vapor
seal (radon etc)
* can have
adhesion issues on damp moisture rich surfaces
* tough and
durable
* standard
commercial - professional floor solution
* short pot life -
working time
* use with colored
chips or colored sands
* works with chips
- sands - multi-coat systems |
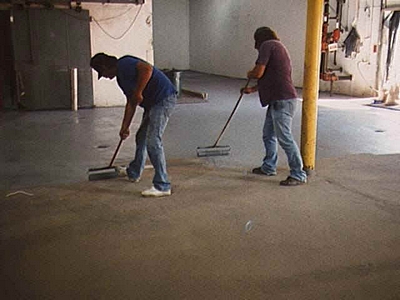
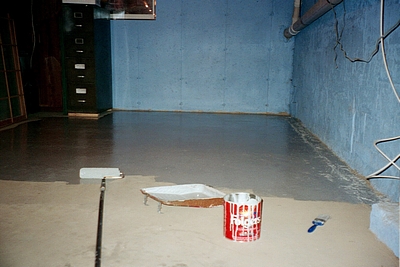
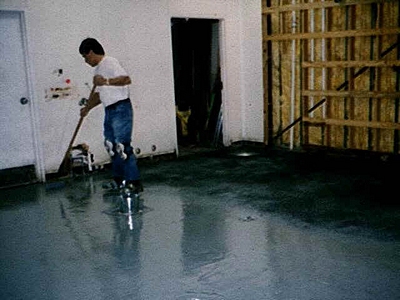
Applying The Epoxy
The epoxy can be applied to the floor straight from the rolling pan using a paint roller. However, experienced
applicators have several alternative methods that they use. Most pour the epoxy from the mixing container directly
on to the floor in ribbons. This spreads out the epoxy and extends working time. After the epoxy is poured out
upon the floor it is often spread out with either a squeegee or notched trowel (usually one with 1/16 inch notches
purchased in the tile section of the hardware store). After the epoxy is spread, then the paint roller is used
to evenly and uniformly level and finish spreading out the epoxy.
The recommended roller is a 3/16 inch nap roller specifically labeled for use with epoxies. An alternative would
be a ‘lintless' roller (although I have never actually seen a roller labeled lintless). Foam rollers work also,
but the foam may begin to break off before job is complete. Regular ‘bulk' rollers (3/8 inch nap) will work too,
but will leave roller fibers/lint on the surface for the first 30 square feet or so. Because the roller is in constant
use the epoxy on it stays fresh and a single roller will last for the entire job, no matter how many batches of
epoxy are mixed.
To make sure you are not using too much or too little epoxy you need to keep track of how much you are using for
a given area. If aiming for a coverage rate of 100 square feet per gallon you should be using about one quart per
25 square feet (one five foot by five foot section). If you are using too much epoxy, work the roller/squeegee
or notched towel a bit harder and/or thin it a little bit with lacquer thinner, MEK, or xylene. The epoxy will
also thicken and not spread as well if the epoxy or the floor is cold. Epoxy thickness is very related to temperature
(warmer temperatures mean thinner epoxy but also less pot life or working time). Just a little bit of thinner will
make a big difference. You can also often simply spread out the epoxy a bit more with the squeegee, notched towel
(this is where the notches and the downward pressure on the trowel really prove their value), or roller.
Broadcasting Sand, Rubber Grit, or Walnut Shell, or Vinyl Chips Into The Epoxy
For a modest anti-slip surface, small amounts of sand or some other material can be tossed (broadcast) randomly
upon the freshly rolled out epoxy. Use the paint roller to "back roll" over the sand. This will completely
coat the sand grains and, surprisingly, redistribute them in a relatively uniform pattern. When using a thin, clear
epoxy topcoat, fine ‘sugar sand' can be sprinkled on to the epoxy to provide a fine, invisible, texture.
A true quartz etc./epoxy floor however, requires that the sand or anti-slip material be ‘broadcast to excess (or
refusal)'. This means you keep adding sand on top of the epoxy until no epoxy shows or bleeds through the sand
topcoat. You will find that it may take several minutes for the epoxy to ‘soak through' the sand so recheck the
area every few minutes looking for ‘shiny spots' that need more sand. It will take about a half pound to one pound
of sand per square foot to completely cover the epoxy. Later you will recover about half of the sand as excess.
With experience you will learn to broadcast less and less excess sand on to the epoxy. The result is very attractive,
uniform, semi rough finish (note: if using walnut shell or rubber grit, you'll get about 16-18 square feet per
gallon (4 quarts) of material).
If using the vinyl chips, practice before hand sprinkling them uniformly upon a surface. You don't want to accidentally
drop lumps of chips all in one spot and you also want a semi-uniform density or clustering of chips on the surface.
If you make a mistake you can ‘fix' it with more or less chips or epoxy either at this point or when the clear
topcoat is applied.
Note that you can walk on the freshly applied epoxy wearing spiked shoes, either homemade or purchased. Garden
shops sell spiked shoes for aerating lawns. Golf shoes would probably also work. The shoes leave tiny holes in
the liquid epoxy which quickly fill back in providing the epoxy has not yet begun to harden.
After The First Coat of Epoxy
If you have taped out areas or edges to keep the epoxy from getting on a wall or pipe, you must remove the tape
before the epoxy hardens. If you do not, the tape will be epoxied forever in place.
After the epoxy has hardened (overnight or so) carefully sweep or blow off the excess sand and chips. Then roll
a topcoat of more epoxy (usually, but not always, a clear epoxy such as our Bio-Clear 810 epoxy) over the new surface
to seal and protect the chips or sand grains. With the broadcast sand system, the now rougher surface will consume
more epoxy. You may need to thin the epoxy somewhat or really pay attention to spreading it out as much as possible.
If you fail to take this into account you may find yourself short of epoxy or that much of the anti-slip texture
has been filled in with the epoxy.
Epoxies exposed to sunlight will yellow, lose their gloss, and eventually cloud up. Some colors of epoxy show this
more than others. Brick red epoxy shows very little yellowing, white, followed by clear, is the worst.
We sell a 2-part acrylic polyurethane with max UV blockers (Acrylic Poly UV Plus) that can be applied over the
epoxy topcoat that absorbs enough of the UV to keep epoxy from yellowing in direct sunlight. Apply over a topcoat
of epoxy or directly over the broadcast sand/walnut/rubber. The down side of the polyurethane is the strong solvent
odor is a a very thin coating. See our
clear
coat product page. Also see our our info page about 'clear coats for epoxy
floors - the big vendor rip-off" -
epoxy floor clear top coat .
Clean Up
You can clean your tools before the epoxy has hardened with either lacquer thinner, MEK, or our special non-solvent
TA 661 product. If allowed to soak, the TA 661 will even remove partially cured epoxy. On tools and skin the TA
661 will leave an oily feel that can be washed off with regular soap and water. Do not bother to save brushes and
rollers, dispose of after each use.
Dear Sir, We applied the Industrial Floor Epoxy
in our work trailer yesterday, and I swept off the excess sand today. We are very pleased with the results. None
of us had any particular experience with this kind of application, but we followed the instructions, had a fairly
cool morning to do the work, and managed to complete the application in about 90 minutes, dividing the work and
mixing epoxy in three sections. I would recommend this material to friends looking to do similar work. Thank you
for your assistance, the all-purpose sand was quite adequate for our needs.
R.C. - Virginia Transportation Research Council (9/2010)
ON-LINE
CATALOG HOMEPAGE.
Inside Our non-marine, commercial, DIY Catalog:
corro coat FC 2100; water gard 300; CM 15; crack coat™;
liqua tile 1172 potable water; water prime
Find Corro Coat FC
2100 and Water Gard 300 epoxy in our Best Selling - fix anything
Catalog
water bond (water based); industrial floor epoxy;
bio
vee seal; walnut shell; rough coat grit filled
epoxy floor paint; epoxy clear top resi
wet/dry 700; splash zone A-788, epoxy cream; splash
zone a-788
Find
Wet Dry 700 epoxy in our Best Selling - fix anything
Catalog
low V epoxy; basic no blush;
ESP
155; Bio-Clear 810; epoxy clear top resin
Find
Low V, Basic No Blush, and ES 155 epoxy in our Best Selling - fix anything
Catalog
Aluthane moisture cured urethane;
Acrylic Poly UV Plus
and other 2 part polys ;
Capt.
Tolley's creeping crack sealer; india spar varnish;
Find Aluthane in our Best Selling - fix anything
Catalog
fumed silica; fiber fill; micro
balloons/micro-spheres; graphite; wood flour; EZ thick, rock flour;
water activated pipe wrap; TA 661 solvent-free epoxy brush cleaner; fiberglass tape/cloth
short nap epoxy rollers; epoxy/stone deck resurfacing roller; 1 inch foam brushes;
2 inch bristle brushes; tongue depressors
Questions? / Phone order?
/
EMAIL / CALL 603-435-7199 EST /
BUY
ONLINE
GOOGLE SITE SEARCH - Click here
Epoxy specific site search
Click here - YouTube video.
Learn about
Progressive
Epoxy
Polymers
Inc.
EVAL4U
- how to evaluate your epoxy
vendor -
CLICK HERE -
|
Let's
stay connected.
It's a win-win situation. Receive our online NEWSLETTER by
emailing us your name and email address. |
Legal Stuff
/ Returns
NOTICE: Legal
notices, Terms of Service, warranty information, disclaimers, health
warnings, etc. are required reading before using web site, ordering and/or
using Products. Any such use and/or ordering, online or by telephone, shall
constitute acceptance and knowledge of all such terms.
CLICK HERE
to
access these terms.
Please note: Whenever you purchase from this web site, and with each new
purchase, you are granting us full and complete permission to add you to our
email newsletter list at our option. Accessing this web site, and/or
purchasing our products, grants Progressive Epoxy Polymers, Inc. permission
to add you to our email newsletter list. You may opt out from the newsletter
at any time (link to do so can be found on the newsletter).
RETURNS:
call or
email for authorization to return.
Returns
are subject to a 25% restock fee. Customer pays return shipping and must
comply with federal DOT shipping requirement/labeling for hazmat epoxies
under penalty of fines and legal action.
**
Quick
EMAIL / ph 603.435.7199 EST / Google
SITE SEARCH
/ Buy On-line
TWO
STORES / Goto Contact
PAGE / Web Product
CATALOG /
Progressive Epoxy
HOMEPAGE / View
our
VIDEO / Navigation Bar
REPLACEMENT / Data
and MSDS
PRODUCT INFO
/ Epoxy Guru
HELP SITE / Top Selling
Products -
FAVORITES
* *
Progressive Epoxy
Polymers, Inc.
Located in No Sales Tax - New Hampshire (homepage)
EPOXY PAINTS AND RESIN SYSTEMS
1 AND 2 PART URETHANES - COATING SUPPLIES
"The Right Epoxy fixes Everything!"
Visit our Subject / Catalog contents
PAGE
Site sponsor - buy epoxy floor
paint web site and domain
CATALOG/BUY/1PAGE$$